| Author |
Message |
|
Tripyrenees
Firing on two.
Joined: December 17th, 2012, 10:03 pm
Posts: 966
Location: Luscan, Pyrenees, FRANCE

|
 Re: 1955 Traction Avant 11cv Thanks for that - I have seen a lot of people take off the original but I just painted mine yellow, so want to keep it and at least it will be extra cooling as I have heard the Traction suffers from overheating.
So electric fan, temperature gauge and waterless coolant will hopefully combat this.
Ian
|
| December 10th, 2014, 3:02 pm |
 
|
|
|
Tripyrenees
Firing on two.
Joined: December 17th, 2012, 10:03 pm
Posts: 966
Location: Luscan, Pyrenees, FRANCE
|
Re: 1955 Traction Avant 11cv Original distributor found on Le Bon Coin - very happy as it was €30 cheaper than any new replacement I have found. Matches mine exactly  Attachment:
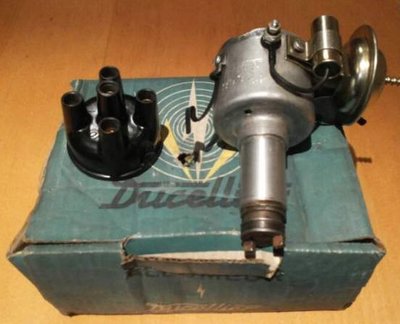 ducellier.jpg [ 62.52 KiB | Viewed 3209 times ]
_________________
https://www.facebook.com/GNGLuscan

|
| December 13th, 2014, 10:16 am |
|
|
|
AZL57
Firing on two.
Joined: October 22nd, 2014, 10:59 pm
Posts: 2227
Location: South-Limburg
|
Re: 1955 Traction Avant 11cv NOS is always better.. have had a lot of problems with modern reproduction rubbish....
|
| December 13th, 2014, 12:16 pm |
|
|
|
Tripyrenees
Firing on two.
Joined: December 17th, 2012, 10:03 pm
Posts: 966
Location: Luscan, Pyrenees, FRANCE
|
Re: 1955 Traction Avant 11cv I think I have finally finished all the really dirty jobs. I raised the car up on axle stands so I could get underneath and get all the crap off the bottom of the floor pan. Also so I could finish off the welding on the replacement front floor panel. Lots of dust but now I can clean the garage and hopefully it will stay a little more dust free  Attachment:
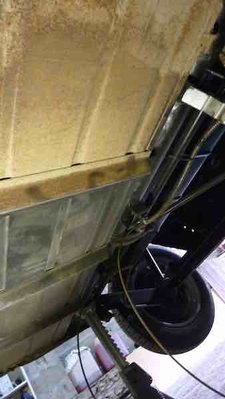 P1060971.jpg [ 19.94 KiB | Viewed 3166 times ]
I slapped a load of rust converter paint (Restom) on the panels and left it to dry. Attachment:
 P1060982.jpeg [ 41.14 KiB | Viewed 3166 times ]
I joined the V sections under the floor. They were slightly off but managed to create a small filler panel. Welded it all up and covered all the seams with a polyurethane seam sealant. Inside I rust protected, primered and painted the inner floor that is covered with the seat cross member. I also seam sealed the welds and edges before putting the cross member back on. Attachment:
 P1060974.jpeg [ 17.96 KiB | Viewed 3166 times ]
So the next job was repairing the seat cross member. I had to remove this to get to the floor panel. So I had to cut the flanges off and then hammer chisel the flange and spot welds from the floor. So will a little bit of angle I made up some new flanges and after lots of marking up (and several failed spot weld attempts..... all good practise ) I fitted it all on the bench. Attachment:
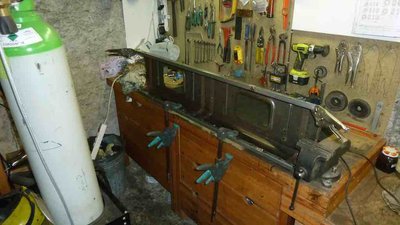 P1060977.jpeg [ 40.67 KiB | Viewed 3166 times ]
It fitted straight in and I spot welded (punch hole then enlarged to 8mm and used a spiral movement on the weld) the cross member to the floor and also to the sills of the body. It seems pretty firm and inspection underneath showed the penetration of weld so I am happy now and getting a little more confident with this welding stuff  Attachment:
 P1060980.jpeg [ 35.29 KiB | Viewed 3166 times ]
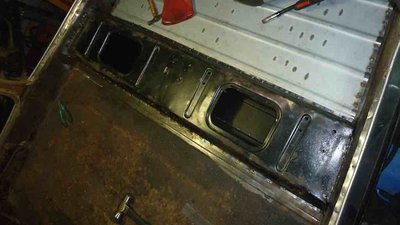
In between the big jobs I always have a side job on the go, normally when it requires a bit of paint spraying and drying. I really needed a new rear number plate light unit. I tried everywhere but none were in stock and at €100 theses were not cheap. So renovation and rectification was the only thing to do. Attachment:
 P1060972.jpeg [ 42.54 KiB | Viewed 3166 times ]
|
| December 15th, 2014, 12:15 pm |
|
|
|
Tripyrenees
Firing on two.
Joined: December 17th, 2012, 10:03 pm
Posts: 966
Location: Luscan, Pyrenees, FRANCE
|
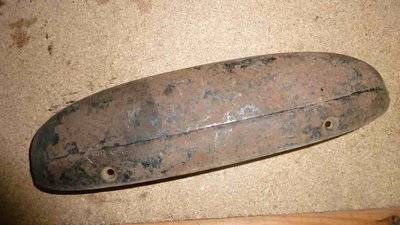
Re: 1955 Traction Avant 11cv All the plastic was gone and the electrical fitting were awful, but with a little micro sablage and wire wheeling it all comes up pretty well. Attachment:
 P1060973.jpeg [ 35.11 KiB | Viewed 3161 times ]
Painted black (for now) on the outer and chrome inside (for refection) the units are looking good. I made up a template for the plastic lenses and made these from an old storage box (I think it was old) and these fit quite well. There is a section that lights up the inside of the boot, I assume when the boot lid is open it lights up the area, I have left the lens off this as I think the heat of the lamps distorted the old lenses, will try anyway and see if it is OK. Attachment:
 P1060978.jpeg [ 39.95 KiB | Viewed 3161 times ]
Attachment:
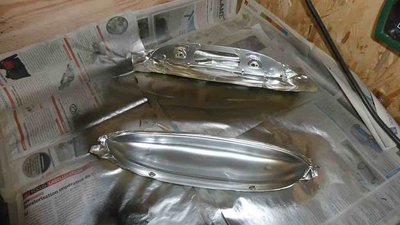 P1060979.jpeg [ 39.22 KiB | Viewed 3161 times ]
Back on the bench to do some clean jobs - Installed new fuel sender and filter unit. Attachment:
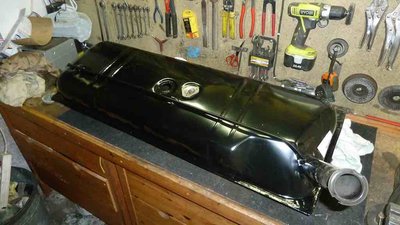 P1060983.jpeg [ 44.97 KiB | Viewed 3161 times ]
I am a bit concerned on whether I need the little plunger unit on the sender (circled in red). The new unit I received form Jose Franssen did not have this. I had a look at transferring it over and it is do-able but if it is not required then I will leave it off as there new unit is not the best i.e. the lever is not free falling very easily. Once I have the system up and working I might try the original unit back in as it looks to be in good order. Attachment:
 feul sender.jpg [ 56.1 KiB | Viewed 3161 times ]
Off to Auto Distribution to get more weld seal and finish off the underside and inner floor panels. I will prime it and then paint with chip seal. Then get the car off there axle stands and back onto the hydraulic lift. There is a plan to this, somewhere
_________________
https://www.facebook.com/GNGLuscan
|
| December 15th, 2014, 12:57 pm |
|
|
|
citroenboat
Firing on two.
Joined: November 11th, 2010, 4:19 pm
Posts: 590
|
Re: 1955 Traction Avant 11cv Is the 'plunger' a damper for the float arm? If "the lever is not free falling very easily" on the new one perhaps it isn't needed. Just thinking out loud.
_________________
Mike
|
| December 15th, 2014, 4:29 pm |
|
|
|
Tripyrenees
Firing on two.
Joined: December 17th, 2012, 10:03 pm
Posts: 966
Location: Luscan, Pyrenees, FRANCE
|
Re: 1955 Traction Avant 11cv It is a damper, very nice design so I am reluctant not to use it. But yes the new one probably doesn't need it.
The old one had a nice cork floater too... I will see when I get the system up whether I need to change it out or not.
|
| December 15th, 2014, 5:31 pm |
|
|
|
Tripyrenees
Firing on two.
Joined: December 17th, 2012, 10:03 pm
Posts: 966
Location: Luscan, Pyrenees, FRANCE
|
Re: 1955 Traction Avant 11cv So yesterday I started on the engine "properly" I received my new gaskets for the piston barrels and duly inserted them and measured the tolerances and all seems good. I then decided to fit the head in place before flipping over the engine. In the 15/6 English manual it says to do it this way and it makes more sense. Although I think I may have a job flipping it over with the extra weight  Attachment:
 P1060987.jpeg [ 33.92 KiB | Viewed 3115 times ]
So now I need to prepare the head. My new coolant tube arrived along with new core plugs. So with a little more cleaning I fitted the pip easily pointed the holes downwards and then sealing (glueing) each end with ultra blue. I also flared the end of the pipe at the water pump end, hoping it won't move too much. Attachment:
 P1060985.jpg [ 38.53 KiB | Viewed 3115 times ]
And fitted all the new core plugs that I had to remove to get rid of the coolant pipe. Slightly easier than removing them  Attachment:
 P1060986.jpeg [ 31.9 KiB | Viewed 3115 times ]
And of course in between these jobs I am finishing off the painted of the floor panel I replaced as well as getting the underneath finished off. So after sealing all the seams and the edges with polyurethane weld seal I painted it all with rust eater and then primer. Attachment:
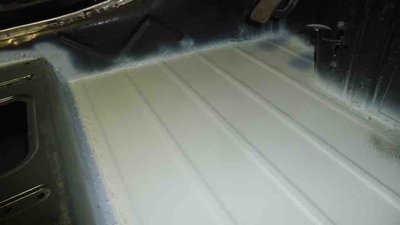 P1060988.jpeg [ 23.21 KiB | Viewed 3115 times ]
Then a nice top coat of satin black just to make it tidy and for the underlay and carpet to sit on  It is starting to look like a car again in side. Attachment:
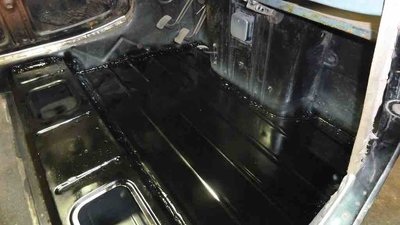 P1060989.jpeg [ 36.41 KiB | Viewed 3115 times ]
|
| December 17th, 2014, 6:44 pm |
|
|
|
Tripyrenees
Firing on two.
Joined: December 17th, 2012, 10:03 pm
Posts: 966
Location: Luscan, Pyrenees, FRANCE
|
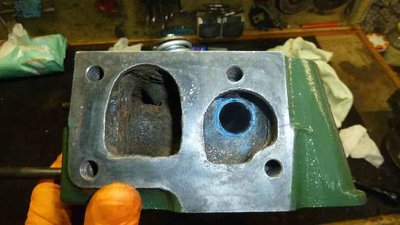
Re: 1955 Traction Avant 11cv So back to the head preparation. I had read about the valve seals needing to be installed just below the split collets and in my gasket pack there were new valve seals. I cannot remember seeing these before when I sent the head to be cleaned, surfaced and new valve seats fitted. They also fitted the new guides and springs. I have a sneaky feeling they did not bother with the seals. I checked number 1 and was correct nothing. So after putting together a Heath Robinson rig to remove the valve springs I inserted the new seals just under the split collects - so an hour or so just getting me back to square 1. Only close inspection of the head, I don't think the company actually did anything other than install new valve seats - I am pretty annoyed but if I went back the Frenchies would just sling their arms in the air and "c'est la vie"  Here is what the head looked like when I got the car Attachment:
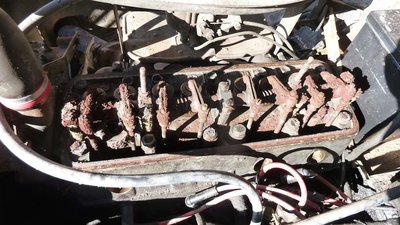 P1060083.jpg [ 95.68 KiB | Viewed 3112 times ]
I stripped down the rocker shaft Attachment:
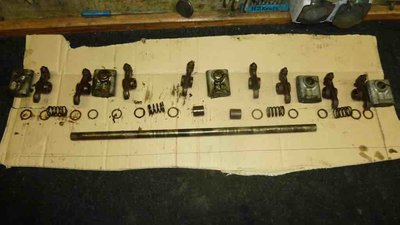 P1060992.jpeg [ 32.54 KiB | Viewed 3112 times ]
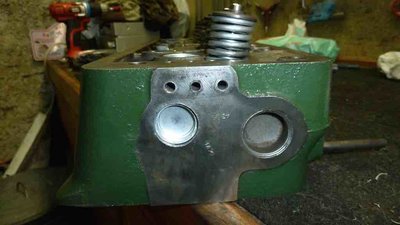
And prepared the head for docking Nice new gaskets and placed the push rods in place. Attachment:
 P1060994.jpeg [ 42.64 KiB | Viewed 3112 times ]
|
| December 17th, 2014, 7:17 pm |
|
|
|
Tripyrenees
Firing on two.
Joined: December 17th, 2012, 10:03 pm
Posts: 966
Location: Luscan, Pyrenees, FRANCE
|
Re: 1955 Traction Avant 11cv On with the rocker shaft all cleaned up. Took some time cleaning out the shaft and making sure all the oil passages were good - I have read a lot on this subject lately. Attachment:
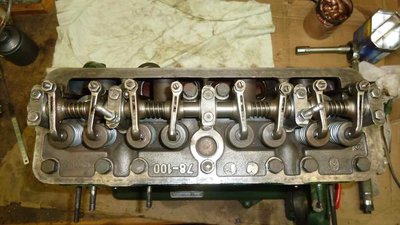 P1060995.jpg [ 53.9 KiB | Viewed 3098 times ]
Looking more like an engine - the cam shaft pulley is fitted and the valves seem to be going up and down in some sort of sequence. Attachment:
 P1060996.jpeg [ 21.33 KiB | Viewed 3098 times ]
And now the upturn of the engine - bloody hell it is heavy, but luckily my wife was passing the garage and I whistled her in Attachment:
 P1060999.jpeg [ 41.65 KiB | Viewed 3098 times ]
And while all that was being done my under floor had a coat of primer and is drying nicely. Stone chip will be adorned tomorrow and then I can get the car back on the lift and off the axle stands. Attachment:
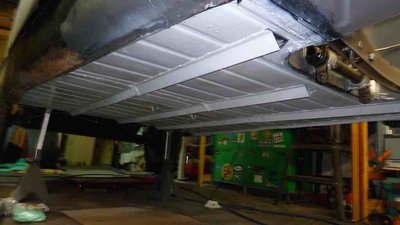 P1060997.jpeg [ 32.51 KiB | Viewed 3098 times ]
|
| December 17th, 2014, 8:58 pm |
|
|
Who is online |
Users browsing this forum: No registered users and 12 guests |
|
You cannot post new topics in this forum
You cannot reply to topics in this forum
You cannot edit your posts in this forum
You cannot delete your posts in this forum
You cannot post attachments in this forum
|
|