| Author |
Message |
|
jasu
Firing on two.
Joined: August 8th, 2012, 11:00 am
Posts: 501
Location: Korpilahti, Finland

|
 Re: 1955 Traction Avant 11cv Tripyrenees wrote: Now if only you can get me a complete ID engine with 4 speed gearbox  Asked that, and yes, there is one from -63 ID. At last summer, there was also -56 and -59 complete front ends, -56 chopped and parted out, -59 gave to friend who is restoring -60 ID... Just come and visit us, price isn't a problem. Only pick up, no posting... 
|
| February 10th, 2015, 8:28 pm |

|
|
|
Tripyrenees
Firing on two.
Joined: December 17th, 2012, 10:03 pm
Posts: 966
Location: Luscan, Pyrenees, FRANCE
|
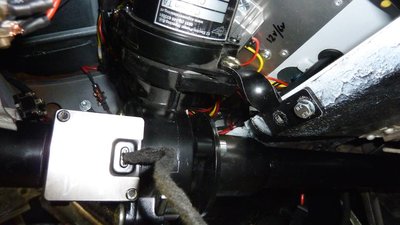
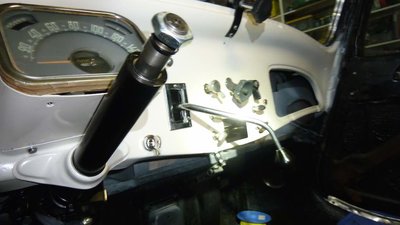
Re: 1955 Traction Avant 11cv On with the steering. The instructions are not great when it comes to the photos as they are too small and dark. It would be nice to have a diagram but I worked it out in the end with a few emails back and forth to EZ Power Steering. Got it bolted in and wired up Attachment:
 P1070246.jpg [ 66.82 KiB | Viewed 3483 times ]
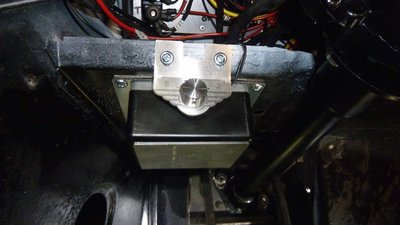
It actually sits higher than I thought and is very close to the gear selector bars. Should be fine though. Only two holes need to be drilled. I have also installed the main electrical box but only temporarily as I will remount this one I have put the carpet in. It is out of the way under the dash and all the screws will be hidden by the carpet with the smaller wires tucked behind. Attachment:
 P1070254.jpeg [ 51.63 KiB | Viewed 3483 times ]
And finally I have a steering column back in the car. I tightened all the steering rack components and track rod ends and put the steering wheel on just to try it. Couldn't feel much difference but then I think I might need to put the tires on the ground for that  Attachment:
 P1070252.jpeg [ 48.79 KiB | Viewed 3483 times ]
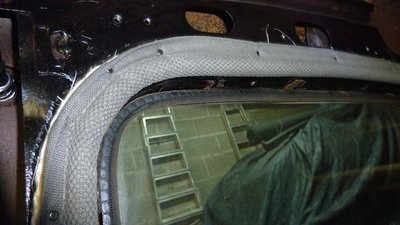
I want to try and get the interior sorted as soon as I can to get it clean inside and all my "nice" things installed before they get tatty and dirty in the garage. So on goes the trim rope which I have glued in place and tapped tightly with a hammer. Some of the difficult areas I have put a trim nail in place. Attachment:
 P1070256.jpeg [ 61.27 KiB | Viewed 3483 times ]
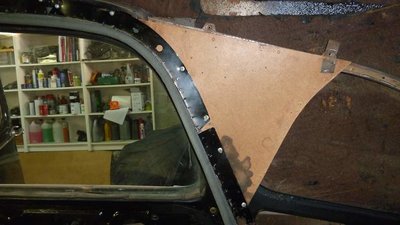
Then I have started putting the grey door trim in place. I thought I could get away with a staple gun but the staples do not hold. So each fixing is with a trim nail and hammer. Long process but I got to use the staple gun on the wooden centre piece  Attachment:
 P1070257.jpeg [ 63.93 KiB | Viewed 3483 times ]
I will add more securings once I have put the headlining strips back in. Attachment:
 P1070258.jpeg [ 64.04 KiB | Viewed 3483 times ]
That is enough for today - but at least it has warmed up a bit.
|
| February 12th, 2015, 9:17 pm |

|
|
|
Tripyrenees
Firing on two.
Joined: December 17th, 2012, 10:03 pm
Posts: 966
Location: Luscan, Pyrenees, FRANCE
|
Re: 1955 Traction Avant 11cv Carried on with the door trims. This was quite time consuming and irritating when the nails did not penetrate the metal. But all in all, it is done. I put in the head liner beading and the old cardboard. I also tried the arm of the rear seat and the side panel just to make sure I knew where the headlining should finish. Attachment:
 P1070263.jpeg [ 62.22 KiB | Viewed 3483 times ]
Round the back and finished off the fuel tank connections and replaced the panel. Put in the sound proofing and strapped it all down with newly painted fixings. Attachment:
 P1070259.jpg [ 67.58 KiB | Viewed 3483 times ]
Attachment:
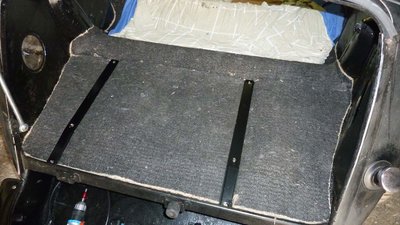 P1070262.jpeg [ 79.35 KiB | Viewed 3483 times ]
And now onto the headlining itself. I bought this from Renel a few months back and it was the cheapest out there. So I was wary of the quality but so far I am very impressed. I had labelled all the rods so I just put them back in place and screwed them to the side walls. Attachment:
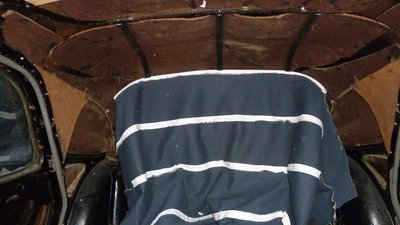 P1070269.jpeg [ 55.68 KiB | Viewed 3483 times ]
And no I have one very large tent. Attachment:
 P1070271.jpeg [ 40.1 KiB | Viewed 3483 times ]
There is a trimming line marked which is pretty accurate. I am trying to work out the best way to fix it under the rear window (top of parcel shelf. I know how it should be done but it is quite a frustrating task. Will carry on tomorrow.
|
| February 12th, 2015, 9:20 pm |
|
|
|
citroenboat
Firing on two.
Joined: November 11th, 2010, 4:19 pm
Posts: 590
|
Re: 1955 Traction Avant 11cv Ever more amazing! Great stuff Ian! Was showing a pal (Bob Brotherhood for those that know...) this thread and greatly amused reading the early posts where you say "I don't want this", "moving it but not to my place!" Bob was well impressed!!
_________________
Mike
|
| February 13th, 2015, 1:03 am |
|
|
|
Tripyrenees
Firing on two.
Joined: December 17th, 2012, 10:03 pm
Posts: 966
Location: Luscan, Pyrenees, FRANCE
|
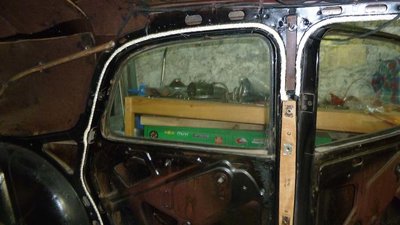
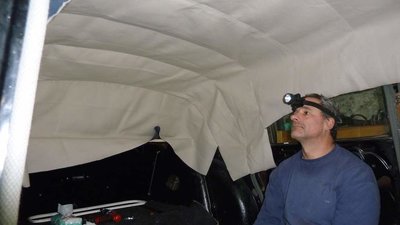
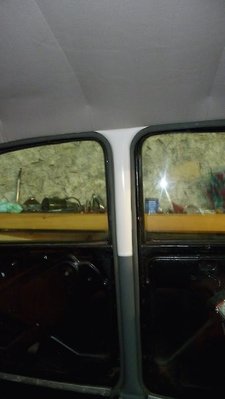
Re: 1955 Traction Avant 11cv It has been another long day sitting in the car. The headlining was not as bad as I thought. It is quite a thick material so trying to stretch it was not so easy and I cam hoping it will hang nice over time. I did glue the loose roof sound proofing so hoping that will stay up there. Inserting it under the side rails was the easiest part but the front window frame was a pain and I still don't think it is correct. It has been a year since I took it off and I am not sure exactly where it is supposed to sit. It just doesn't look right and was tight to fit. I will need to look at another car in detail and adjust as necessary. Attachment:
 P1070278.jpg [ 85.83 KiB | Viewed 3446 times ]
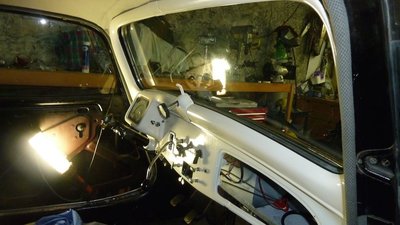
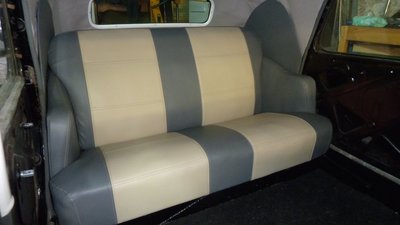
The side strips fit well and I am quite pleased with the colours - this is the first time we have seen the cream and grey together. Attachment:
 P1070279.jpeg [ 30.17 KiB | Viewed 3446 times ]
And as we collected our seats the other day, I could not resist putting in the rear to see what it looks like. I am very pleased with the look. I know it is not original but this car was never going to be restored to the original interior. We wanted a little comfort and something a bit different (not much but just a little) Attachment:
 P1070280.jpeg [ 67.2 KiB | Viewed 3446 times ]
I put in the interior light too - at first it didn't work, then I turned the LED bulb around, then it did work. Then the switch didn't work. I took it out, cleaned the contacts and while doing so worked out the mechanics. So it pulls out and pops back turning on. And then pull it again to turn it off and then it pops back again. I was trying to keep it pulled out and thought it was broken. Citroen did complicate the simplest of things
|
| February 13th, 2015, 9:00 pm |
|
|
|
Tripyrenees
Firing on two.
Joined: December 17th, 2012, 10:03 pm
Posts: 966
Location: Luscan, Pyrenees, FRANCE
|
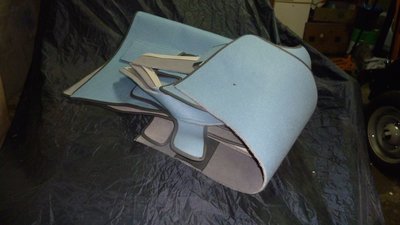
Re: 1955 Traction Avant 11cv On and On and On as they say. So I am trying to get all the jobs done and out of the way to stop providing me with an excuse not to start on the engine rebuild. I think I am pretty much out of "other" job now. I put in place the rear seat arms and fixed them permanently. I also made good the rear parcel shelf as the vinyl I had cut to the template was a little short with my new headliner. All good now though. I found the carpet set we bought from Retro Mobile.... not this year... but last year (nearly one of the first things we bought for this car ). It is from Neoretro and is pretty good quality. Attachment:
 P1070283.jpg [ 113.72 KiB | Viewed 3420 times ]
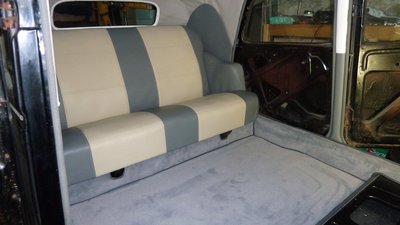
It was a good half day fitting this carpet. The edges were the most difficult as the carpet is quite rigid so getting it to stay in place was a task. But I finally got the hang of it on the last piece Attachment:
 P1070286.jpeg [ 102.17 KiB | Viewed 3420 times ]
The back is starting to look better now - I am waiting on the sticky back vinyl for the doors before I put on the door cards. Attachment:
 P1070285.jpeg [ 88.14 KiB | Viewed 3420 times ]
I also fixed the problem with the number plate light. It only came on when I opened and shut the boot lid. So led me to an earthing problem. I was a little miffed as I had run a dedicated earth wire to the lights. Put my meter on it and found no earth at all. The other end was so close to the connector but had not been connected - quick screw and all is fine I then went onto finish the install of the EZ Electric Power Steering system. The motor is all tucked away up inside the dash and was a little confusing to begin with to find a decent fixing for it. But after a photo or two from their tech support, it all clicked into place. Attachment:
 P1070290.jpeg [ 90.42 KiB | Viewed 3420 times ]
The control box is too pretty to hide away so this is the only electrical item on show at the from of the car. Carpets fitted and even the original pedal covers cleaned up. Attachment:
 P1070291.jpeg [ 108.22 KiB | Viewed 3420 times ]
So now it is time to get on and build this engine. Attachment:
 P1070295.jpeg [ 110.04 KiB | Viewed 3420 times ]
|
| February 15th, 2015, 8:25 pm |
|
|
|
lpgo
Firing on 1-2 Spark
Joined: November 8th, 2009, 5:42 pm
Posts: 2847
Location: NL
|
Re: 1955 Traction Avant 11cv Whats next....central doorlocking with remote control  Looking very nice sofa(r)
_________________
Russell wrote: Hi Geo,
you've been one of the sites biggest attractions in recent years.
Russ
|
| February 16th, 2015, 12:30 am |
|
|
|
Tripyrenees
Firing on two.
Joined: December 17th, 2012, 10:03 pm
Posts: 966
Location: Luscan, Pyrenees, FRANCE
|
Re: 1955 Traction Avant 11cv I know - priorities  The power steering was a command from the wife as we had so many stories from Tractionistes that the steering was so heavy. Start on engine today..... 
|
| February 16th, 2015, 10:13 am |
|
|
|
smyth602
Haggis Muncher
Joined: September 13th, 2012, 7:38 pm
Posts: 571
Location: Denny, Scotland
|
Re: 1955 Traction Avant 11cv Come on then... where's the next update?? How can i go about my evening in a relaxed fashion without knowing whats happened to this amazing car?
|
| February 16th, 2015, 9:20 pm |
|
|
|
Tripyrenees
Firing on two.
Joined: December 17th, 2012, 10:03 pm
Posts: 966
Location: Luscan, Pyrenees, FRANCE
|
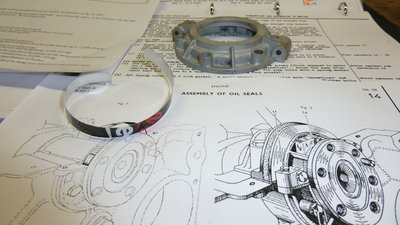
Re: 1955 Traction Avant 11cv I have only just come in - having a few issues today. I knew I would as soon as I started back on the engine  So I fitted the oil return baffle that I got from Jasu (all the way from Finland). I started to follow the correct procedure for this part (which was emailed to me from CTA in Sweden). I cut my shim from a coke can which happens to be 0.1mm thick. Wrapped it around the oil return on the crankshaft as stated. But then the bolts for this part do not fit behind the flywheel flange. It is impossible. Attachment:
 P1070298.jpeg [ 123.33 KiB | Viewed 3368 times ]
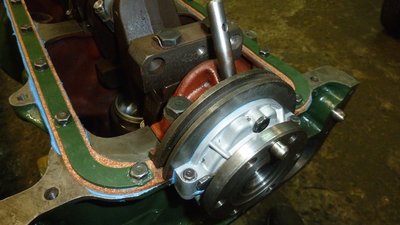
So back to the old procedure and follow a few more photos from an engine rebuild I found online. Fit the baffles first, then lower the crankshaft in and then fit the lower baffle to the main bearing cap and drop that on. Fit loosely and spin the crankshaft. Tighten the baffle halves and test the rotation of the crankshaft. It seems good now. Attachment:
 P1070301.jpeg [ 113.83 KiB | Viewed 3368 times ]
So the part I have been waiting for, for so long is finally on the engine. Attachment:
 P1070303.jpg [ 153.59 KiB | Viewed 3368 times ]
So now I went on to the adjustment/checking of the crankshaft lateral tolerance. I have followed the procedure for the adjustment of the lateral movement of the crankshaft and this is what I have. Installed 3 thrust washers (shims) totalling around 0.23mm (these were already installed). With the main washer, timing pulley and nut tightened on and the crankshaft levered towards the timing case I have a gap of 0.5mm between the main bearing and the main washer. This is way beyond the 0.1 to 0.15mm that is in the book. What can I do to rectify this? Never done this before I am assuming this is a standard procedure for any engine.
|
| February 16th, 2015, 9:37 pm |
|
|
Who is online |
Users browsing this forum: No registered users and 35 guests |
|
You cannot post new topics in this forum
You cannot reply to topics in this forum
You cannot edit your posts in this forum
You cannot delete your posts in this forum
You cannot post attachments in this forum
|

|