| Author |
Message |
|
Neil
super slot
Joined: November 28th, 2008, 11:14 pm
Posts: 8797
Location: Cornwall, UK

|
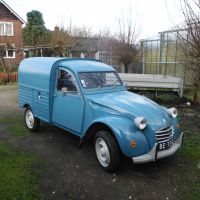
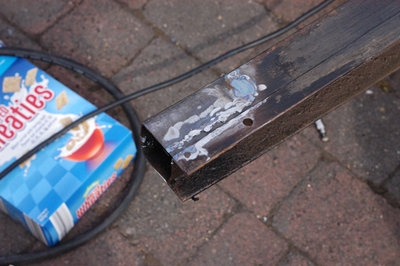
 Re: 1976 AZU250 Smiffy wrote: My first attempt at butt welding: Is that welding with your arse? 
_________________

|
| June 30th, 2013, 11:05 am |
 
|
|
|
Smiffy
Firing on two.
Joined: October 23rd, 2009, 10:41 pm
Posts: 2356
Location: Worcestershire
|
Re: 1976 AZU250  Strangely enough, that's what my brother said when he saw it! Cheeky sods, the pair of you. It was quite clearly a chicken's arse that was used.
_________________

|
| June 30th, 2013, 11:46 am |
|
|
|
Geert
Firing on two.
Joined: July 10th, 2010, 12:35 pm
Posts: 1174
Location: Magyarország
|
Re: 1976 AZU250 Start welding an old panel of your van which you are getting rid of any way , so you get the feeling how to weld such a delicate piece of metal .
Mind you, it is so thin ! You need some practice on old panels to know how to do it properly.
Don't try it on newly bought zincor plate. The original metal is much more delicate , thin, rusty and with remains of paint etc.
That is how I did it.
Good luck!
_________________
'T is een kwestie van geduld.........
Ez a türelem kérdése.........
|
| June 30th, 2013, 1:25 pm |
|
|
|
Smiffy
Firing on two.
Joined: October 23rd, 2009, 10:41 pm
Posts: 2356
Location: Worcestershire
|
Re: 1976 AZU250 Geert wrote: Start welding an old panel of your van which you are getting rid of any way , so you get the feeling how to weld such a delicate piece of metal .
Mind you, it is so thin ! You need some practice on old panels to know how to do it properly.
Don't try it on newly bought zincor plate. The original metal is much more delicate , thin, rusty and with remains of paint etc.
That is how I did it.
Good luck! Sound advice. Thanks Geert. That rear door is in a bit of a state, so I thought I'd just have a practice on it, since it was only good for scrap if I didn't try to save it. The weld turned out better than I expected, although the experience did convince me that I need to buy some clamp thingies that hold the metal together for those vital first tacks. The new metal I used was from an old microwave oven. Perfect thickness!
_________________
Last edited by Smiffy on June 30th, 2013, 10:48 pm, edited 1 time in total.
|
| June 30th, 2013, 9:48 pm |
|
|
|
Geert
Firing on two.
Joined: July 10th, 2010, 12:35 pm
Posts: 1174
Location: Magyarország
|
Re: 1976 AZU250 You definitively need those clamp thingies!
_________________
'T is een kwestie van geduld.........
Ez a türelem kérdése.........
|
| June 30th, 2013, 10:35 pm |
|
|
|
Geert
Firing on two.
Joined: July 10th, 2010, 12:35 pm
Posts: 1174
Location: Magyarország
|
Re: 1976 AZU250 Did you make any progress in welding last week ?
_________________
'T is een kwestie van geduld.........
Ez a türelem kérdése.........
|
| July 7th, 2013, 7:59 am |
|
|
|
Smiffy
Firing on two.
Joined: October 23rd, 2009, 10:41 pm
Posts: 2356
Location: Worcestershire
|
Re: 1976 AZU250 Geert wrote: Did you make any progress in welding last week ? Well, work was too busy last week, but yesterday the weather was soooo good that I cancelled everything and went and did some serious sorting out. I separated the body from the chassis, and put the body in storage in a dry barn, away from the chassis. This meant that I could finally get some real work done! I cleaned the chassis and got rid of all the oily gunk and crud and surface rust and dust, then had a go at some areas that need attention. One of the outrigger thingies that the van body sits on was a bit rotten at the end, so I cut the bad bits out and welded a very smart new piece on. Created my own 3/4 box section for it and everything. Looks great. Forgot to take pics, though, sorry! Then I cleaned the chassis thoroughly and took a good look at everything. It's looking remarkably good, on the whole, although the skin on top of the chassis near the front was looking a little rough, and the previous owner had done what looked like a suspiciously half-hearted patch weld on a couple of areas. After a few minutes of procrastination and a strong cup of coffee, I decided to rev up the angle grinder with a new cutting disc attached. 30 seconds later my decision was vindicated: Attachment:
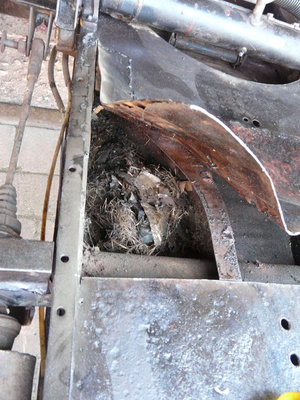 mouse house.jpg [ 608.76 KiB | Viewed 3363 times ]
Five minutes later I'd demolished Mr Mouse's abode and cut out the section of poor-condition skin, and cleaned up the cavity: Attachment:
 002.jpg [ 329.68 KiB | Viewed 3363 times ]
As you can see I also cut off the rotten bits of lip on either side. I've welded neat little replacement pieces back on now, and put a couple of tiny patches back on the internal curved pieces (which got holed when I bashed out the spot welds that held it to the floor). It's all looking nice and clean now, and the chassis is generally in very good condition. The spring cans look a bit knackered, and the rods that come from them look rather tired. Not sure if it's worth saving them. I have donor parts that I can replace them with. Sadly, I'm going to have to work tomorrow... and Thursday... and Friday - so the rest of this little job will have to wait till the weekend. 
_________________
|
| July 9th, 2013, 11:07 pm |
|
|
|
Geert
Firing on two.
Joined: July 10th, 2010, 12:35 pm
Posts: 1174
Location: Magyarország
|
Re: 1976 AZU250 Good of you !
Please post some more pictures as the job continues .
_________________
'T is een kwestie van geduld.........
Ez a türelem kérdése.........
|
| July 11th, 2013, 6:59 am |
|
|
|
Smiffy
Firing on two.
Joined: October 23rd, 2009, 10:41 pm
Posts: 2356
Location: Worcestershire
|
Re: 1976 AZU250 Perfect weather for messing about with an old car! However, before getting down to work I decided to clean out my molasses bath. Top tip for next time: do it in the winter. Man, it stank to high heaven. Literally, smelt like a slurry pit! Next, fired up the welder and the grinder, got myself a big jug of water (for self-hydration), doused my T-shirt in water to keep cool, then set to work. Started by prepping the area and cutting out the new panel: Attachment:
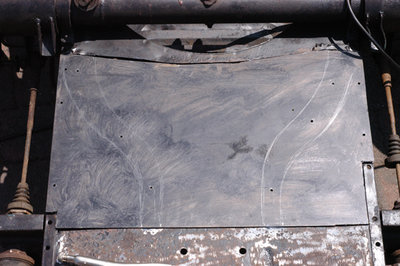 008.jpg [ 274.62 KiB | Viewed 3290 times ]
Then I butt-welded it in and ground back the welds: Attachment:
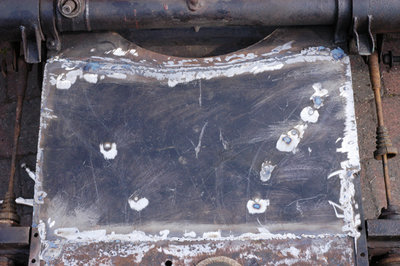 010.jpg [ 313.87 KiB | Viewed 3290 times ]
After that I cut out some rot on the rear arms, shaped some new pieces and butt-welded them in, before grinding back the blobs. Attachment:
 012.jpg [ 275.17 KiB | Viewed 3290 times ]
Attachment:
 013.jpg [ 259.87 KiB | Viewed 3290 times ]
Finished off with a quick spray of Fertan to prevent the rust monster from getting his teeth into the new work, then retired to the garden for a spot of chicken with salad and a glass or two of vin rouge. Cheers!
_________________
|
| July 14th, 2013, 10:58 pm |
|
|
|
Russell
Firing on two.
Joined: November 29th, 2008, 10:05 pm
Posts: 9259
Location: West Sussex, U.K.
|
Re: 1976 AZU250 You've made a nice job of that. I can never be arsed to take my time and make such a job as neat as that.
_________________
samfieldhouse wrote: What I like about I2F is that there is no pretence of democracy.
|
| July 16th, 2013, 11:34 pm |
|
|
Who is online |
Users browsing this forum: No registered users and 17 guests |
|
You cannot post new topics in this forum
You cannot reply to topics in this forum
You cannot edit your posts in this forum
You cannot delete your posts in this forum
You cannot post attachments in this forum
|
|