| Author |
Message |
|
Little Louis
Field Plougher
Joined: February 8th, 2009, 12:07 am
Posts: 2357

|
 Re: My old Blue Bamboo I love it. *note to self get a narrow headlamp bar*
|
| April 25th, 2010, 12:03 am |

|
|
|
Rhythm Thief
Firing on two.
Joined: March 10th, 2010, 12:37 am
Posts: 1927
Location: Alone in my polytunnel with my pitiful competition onions
|
Re: My old Blue Bamboo Old-Nail wrote: ... the problem lies with me really, and my lack of patience. Unfortunately I can go from flat calm to a murderous rage in an instant! I do that. Especially when inanimate objects are messing me around ...  But my car is scruffy enough to get away with it.
_________________
The best things in life aren't things.
|
| April 25th, 2010, 12:36 am |
|
|
|
Neil
super slot
Joined: November 28th, 2008, 11:14 pm
Posts: 8797
Location: Cornwall, UK
|
Re: My old Blue Bamboo This>  is *almost* the 'money shot'!
_________________

|
| April 25th, 2010, 12:46 am |

|
|
|
louise2cv
Firing on two.
Joined: December 23rd, 2008, 9:43 pm
Posts: 483
|
Re: My old Blue Bamboo This> makes me want a 2cv again. Beautiful.
_________________

|
| April 25th, 2010, 9:23 am |
|
|
|
Old-Nail
Firing on two.
Joined: October 7th, 2009, 12:10 pm
Posts: 2192
Location: NWUK
|
Re: My old Blue Bamboo Thanks guys, it's turning out quite well for a first attempt so I'm pleased with it so far, ( bar for one or two things that I'll highlight at the end). I've just written out a 'to do' list, as up until now I've been relying on memory and I'm sure to miss or forget something. I'm also compiling a snag list of things that I need to return to and put right before it's finished. With the lions share of the exterior done the next things in my sights are the seats which need complete refurbishment. Again I don't want to be buying ready made foam etc. I'll make my own, with perhaps new covers to go over them. I machine washed my old covers but they look sad, and besides I quite fancy some red ones if I can find them. Those quarter panels will get the two colour treatment, as much to see how it's done as anything, but the different colour will just break up the monotony of a single colour car. One tip I can pass on regarding the grey that I'll be using on the seat frames and have used everywhere else to match the Citroen Gris Rose grey. In the early days of this resto I found that Ford Dove grey from Halfords matched gris rose pretty well, and I was spraying things with that, but at six quid a can I was going through too many! I looked on ebay and there is a seller that sells proper cellulose paint in litre cans (which when mixed for spraying gives you 2 litres) for around £16.00 including postage.  The colours offered are taken from the old RAL standard paint charts, but there are a large number of them so virtually any colour you want, I chose RAL 7032 Pebble Grey which is pretty much Gris rose - but a damn sight cheaper than using Halfords rattle can Dove grey. One single 1 litre can gives enough 'gris rose' to do a full set of 2cv ancillary parts, seat frames, trim, wheels the lot - all for sixteen quid! Wish I'd have known that at the start!  Russ I agree that those plastic inserts would be the way to go, I actually had a brand new set recently but let them go with the bumpers they came with because they were Dyane items, not that there would be much (if any) difference really. Maybe I'll get some more in future? Oh, and watch for the couple of ideas that I've had for adding something a bit different to the car detailing rather than buy the ready made stuff that's out there. 
_________________

'Democracy my Arse'
|
| April 25th, 2010, 3:02 pm |
|
|
|
Xmas
Firing on two.
Joined: September 6th, 2009, 12:56 am
Posts: 467
Location: Oxfordshire
|
Re: My old Blue Bamboo This> Made me involuntarily say "Ohhh" when I saw it. Great work!
_________________

|
| April 25th, 2010, 8:53 pm |
|
|
|
Old-Nail
Firing on two.
Joined: October 7th, 2009, 12:10 pm
Posts: 2192
Location: NWUK
|
Re: My old Blue Bamboo Xmas wrote: Made me involuntarily say "Ohhh" when I saw it. Great work! Made me say an involuntary 'Ooh' this afternoon when I reckoned up how much the remaining parts list will cost  ..and I thought I was nearly finished!
_________________
'Democracy my Arse'
|
| April 25th, 2010, 9:31 pm |
|
|
|
james2cv
Firing on two.
Joined: April 18th, 2009, 8:01 pm
Posts: 947
Location: Paris/Manc
|
Re: My old Blue Bamboo
_________________

|
| April 25th, 2010, 9:41 pm |
|
|
|
Old-Nail
Firing on two.
Joined: October 7th, 2009, 12:10 pm
Posts: 2192
Location: NWUK
|
Re: My old Blue Bamboo Today's post is a update of two earlier ones that I did, one regarding the back seat and another the Quillery steering wheel. I've said before that one of the things that really grates on my nerves is the very thought of metal to metal contact, and if there's any way that I can avoid it then I will. And so it was that while cleaning up the rear seat frame this afternoon in readiness for paint I noticed something else. One of the forum members recently sent me a set of rubber bungs that sit in the back legs or the rear seat to stop them chafing metal on the metal floor, (cheers mate) but who knew that there were supposed to be rubber rings on the front legs for the same purpose? 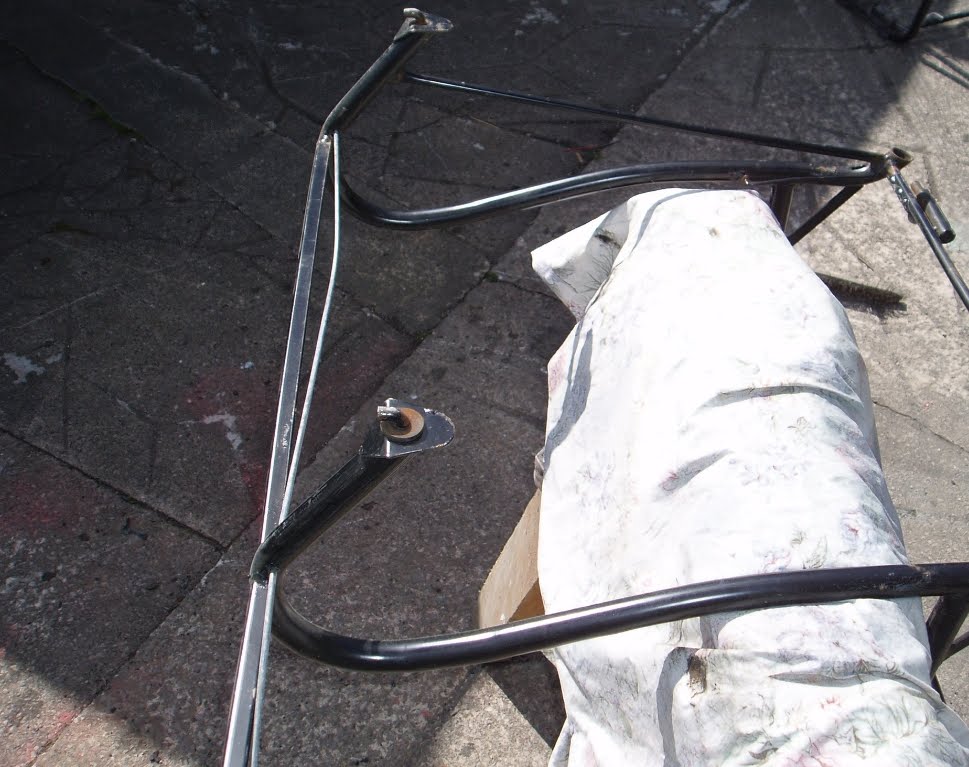 Take a look at the middle prong of the seat leg above which is the only one that still has one on, I'd never noticed them before but there they are...or not as the case may be. It won't be difficult to make some more but who'd have thought they had them in the first place? I've certainly never noticed them, well you live and learn. Now on to that bakelite Quillery steering wheel that I bought. Anyone reading this blog regularly will remember that it was dark blue when I got it, and cracked in two places, although they were only hairline cracks. I filled the cracks with epoxy glue before sanding it flat which sorted the cracks, or rather it sorted one of them as I sanded the stuff too soon and it lifted out of the other. Not to worry. I rubbed down and etch primed the entire wheel before giving it several thin coats of white enamel paint. Ordinarily that would suffice, but as I like experimenting I wanted to try something new. If I were to say "warm and cool greys" some of you might not know what I mean so to clarify a 'warm' grey is one that tends slightly toward brown, and a 'cool' grey tends slightly toward blue. The grey that I mentioned in the last post which is a good substitute for Citroen Gris Rose is a warm grey, as it has a slight brownish tinge if you put it against pure white. The original Quillery steering wheels for 2cv's however, were done in a 'cool' grey, so I needed to find a suitable substitute grey paint. 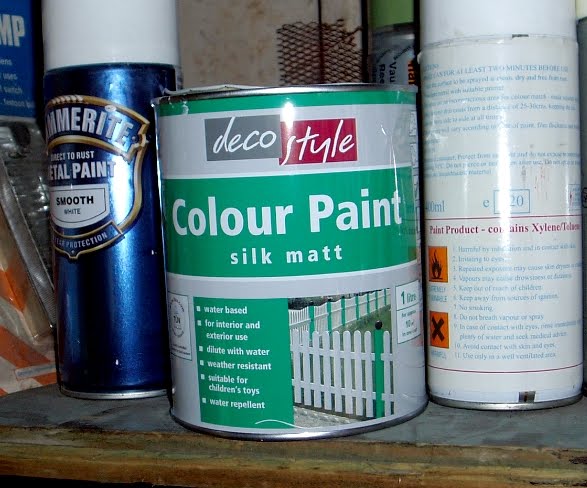 Aldi to the rescue! I'm not kidding, I'm sure the management at Aldi must keep track of what I'm doing because a trip in there always provides the solution. Thinking of gardening next week? Aldi will have spades rakes and gloves in, a spot of decorating perhaps?....the following week they'll be selling brushes and rollers! Seriously, the number of times a quick trip to Aldi has pulled me out of the doo-doo I've lost count. Anyway, what did they have in to solve my problem this time? Only the exact shade grey paint that I wanted that's all. Four quid a litre tin, and it is the modern waterbased stuff that dries as hard as enamel but thins with water so no toxic fumes flying about for a change. At first I was a bit wary of it, being water based isn't that just emulsion paint I thought? So I bought some and did a test piece which, after drying looked superb and had a tough silk sheen finish. I scuffed up the wheel again, mixed some of the paint thinned with water, and sprayed it on. I wasn't sure about this as my gun isn't designed for water based paint but it went on a dream! 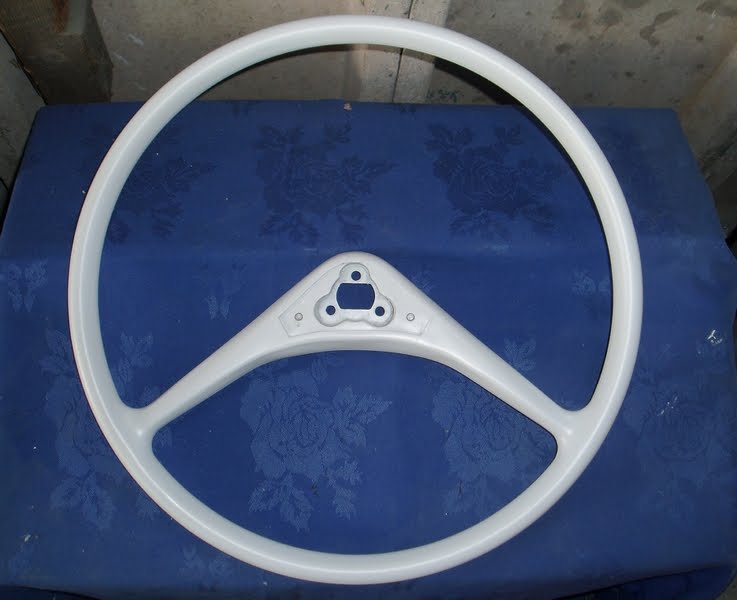 Once again I put several thin coats on, with my gun set at a higher pressure than normal in order to atomise the stuff evenly and save having to add too much water to it. These modern paints are brilliant, it dried to a very nice smooth finish which I could leave as is, or possibly add a couple of coats of clear lacquer for added protection. 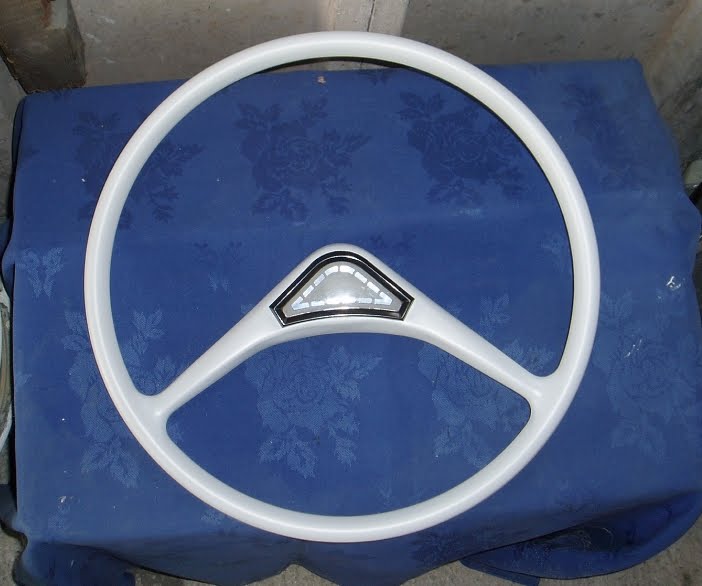 Compare my finished wheel (above) to an original Citroen fitment (below) taken from a French ebay advert. You've just gotta love Aldi!  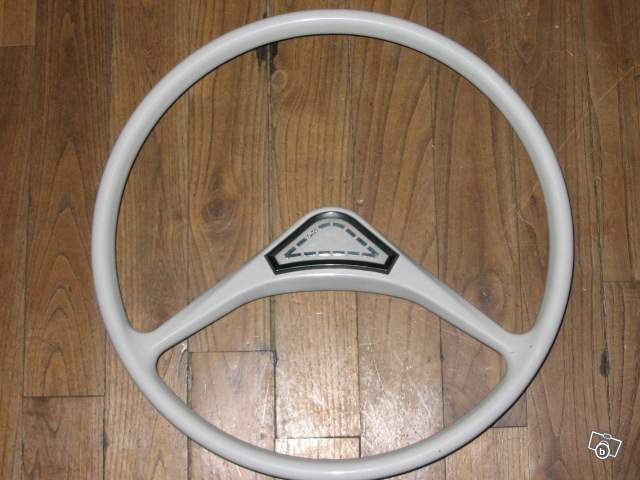
_________________
'Democracy my Arse'
|
| April 26th, 2010, 7:47 pm |
|
|
|
Old-Nail
Firing on two.
Joined: October 7th, 2009, 12:10 pm
Posts: 2192
Location: NWUK
|
Re: My old Blue Bamboo  The nearer I get to the finish the more I'm in danger of 'spoiling the ship for a ha'porth of tar' as they used to say. For those not familiar with that saying it simply means that by skimping on a tiny detail you spoil the whole effect, and make the job less good. When I began this rebuild (which is twelve months ago now) I was meticulous in detailing everything, but as I near the end I am tempted to rush a little, to cut corners even. And that's what I did when painting the seat frames. In order to speed things along I broke the advice I gave earlier in this blog regarding surface preparation, hoping to 'get away with it' and speed the job along. It didn't work. Having removed and treated the rust previously, instead of carefully degreasing, sanding, priming and then painting the seat frames I went for a quick wipe over with panel wipe and a even quicker sand, I skipped the primer stage altogether and just sprayed the topcoat on. The result was an outbreak of what painters call 'fish-eyes', which are craters in the paint caused by the presence of contaminants on the surface.  That meant more sanding and cleaning once the paint was dry, so the lesson is you simply can't take short cuts and expect good results. The finished seat frames will be covered by the upholstery anyway, but having learned the 'Ha'porth of Tar' lesson I'll take more care in future.  I also gave the Quillery wheel a couple of coats of clear lacquer to protect it when in use, again I had no idea whether the cellulose lacquer would sit over the dry waterbased stuff but it did, and the wheel now looks very well. Note in both photo's the method of suspending the objects, my 'skyhooks' as I call them. When they first arrived having bought them from ebay Mrs. Nail said "And what are you going to do with them?" Heh heh, they've been like a Swiss army knife to me they have, I couldn't have managed without them. Once the paint was dry on the seat frames I replaced the webbing with new as well as many of the suspension rubbers that were quite crumbly, I put a lot more on than there were originally too so I don't know if that was overkill, or perhaps it will make the seats a bit firmer to sit on for any fat bastards.  I then placed the rubber bungs back in the apertures in the rear feet, and for the front feet I cut a suitable rubber grommet in half to make rubber circles like those that were fitted as standard. The photo below shows the Citroen original on the far left, and the Old-Nail invention/replacement to the lower left. 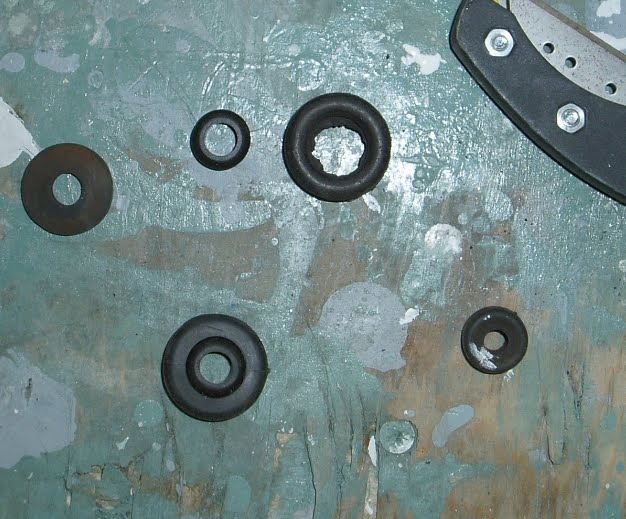 Finally the seats were put inside the car giving another bit more room to move in the garage. Job done! Now remember I said that I noticed things? Well I've noticed that on some 2cv's that I've had there were small, semi-circular plastic bungs in the top of the back door hinge. If you look at the extreme top left of this next photo you'll see where I mean, and you'll also see I don't have any. Has anyone used anything else in there successfully? I only ask as they were perhaps there originally to protect the hinge from water continually running inside it, so I'd like to do the same. 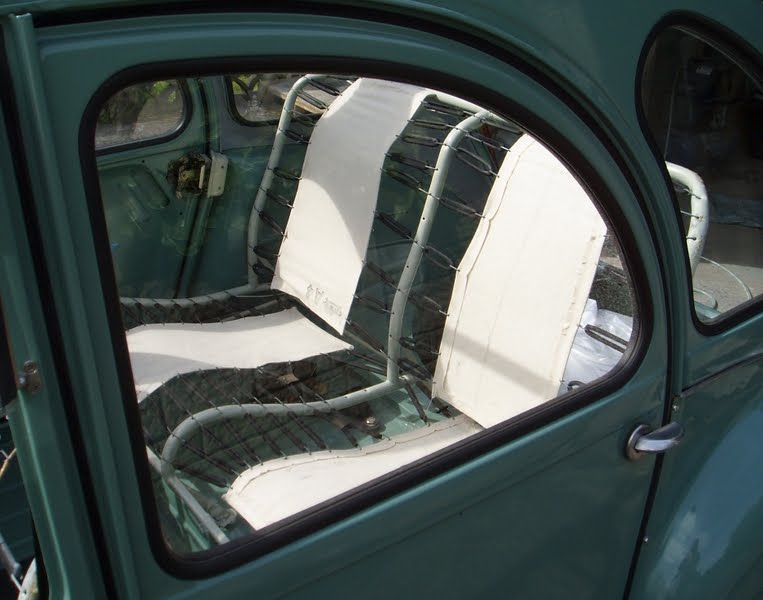
_________________
'Democracy my Arse'
|
| April 27th, 2010, 6:30 pm |
|
|
Who is online |
Users browsing this forum: No registered users and 29 guests |
|
You cannot post new topics in this forum
You cannot reply to topics in this forum
You cannot edit your posts in this forum
You cannot delete your posts in this forum
You cannot post attachments in this forum
|
|