| Author |
Message |
|
hjbharry
Firing on two.
Joined: May 1st, 2009, 11:36 pm
Posts: 856
Location: hertfordshire

|
 Re: My old Blue Bamboo cotton moisturising gloves  tesco-£2.50 frankie has those
_________________

Low and Loud!
|
| April 10th, 2010, 11:25 am |

|
|
|
Old-Nail
Firing on two.
Joined: October 7th, 2009, 12:10 pm
Posts: 2192
Location: NWUK
|
Re: My old Blue Bamboo  I awoke this morning to a beautifully sunny day which had me leaping out of bed and straight into the garage. Mrs Nail says a 'good morning' from me might have been nice! Women just don't understand that when the sun is shining it's 'garage' weather. I wanted to get the bonnet finished today, so using one of my 'skyhooks' I hung it up from the rafters so that I could start the top-coating on the reverse side. In the photo above you can see how the area that I had previously coated with stone chip was dry and took primer very well, so I began the day by painting all the back edges and the stonechipped area with gloss.  Because of the tinted primer the paint covers well right from the off, but even so I gave it four full coats to build up a good thickness. I did this because even though the finish was acceptable straight from the gun, (above) when painting in an environment such as my dusty and cluttered garage there are bound to be the odd speck or two in the paint. The four coats were put on in anticipation of this next stage where, using 600 wet and dry (which can now be used wet as lacquer isn't porous) I flatted back the paint finish one final time. This removes any bits or kamikazi flies that have come to rest on the surface. Flatting has to be done very carefully as it is very easy to rub through the paint surface completely on the raised ridges in a 2cv bonnet. Once done, the bonnet was wiped off with panel wipe, tacked off with a tack rag and shot with three final coats thinned 70/30 with thinners.  The final coats lay out quite nicely due to the larger amount of thinners used in them, and once this is dry the finish is good enough to leave as is. (below) This method does seem long handed compared to todays two pack paints but the results can be very pleasing. 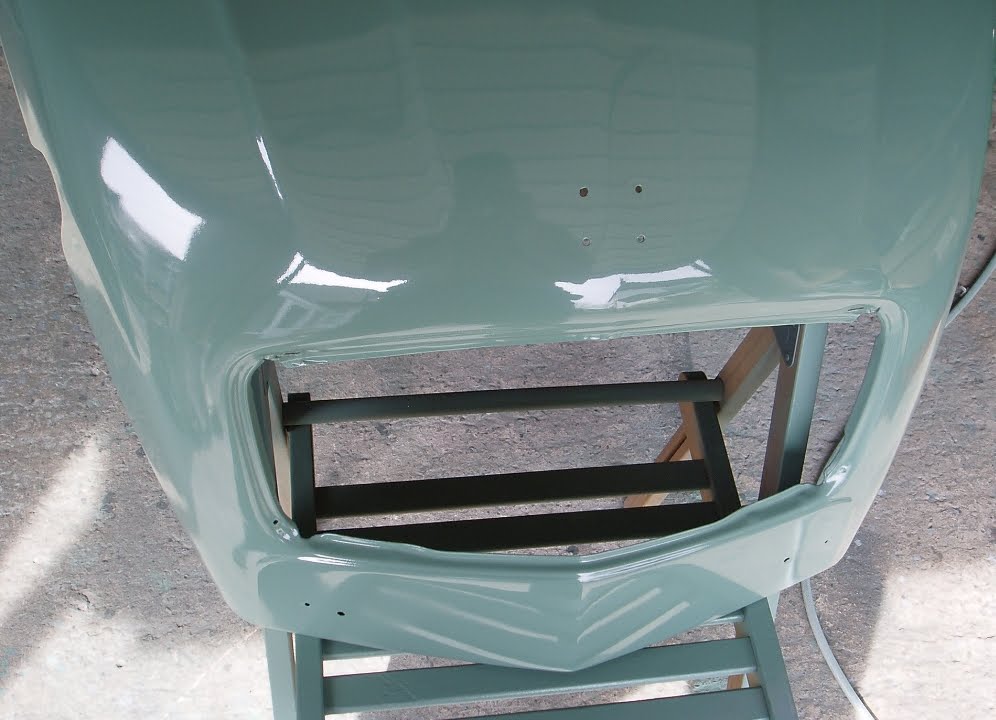 I left the panel to dry in the warmth of the afternoon and I sank a few cold beers before going back and fitting the metal chevrons to the front. These chevrons are the ones that are used on the boot lid of the Citroen DS, and look to be a perfect match for the AZAM type that I wanted. 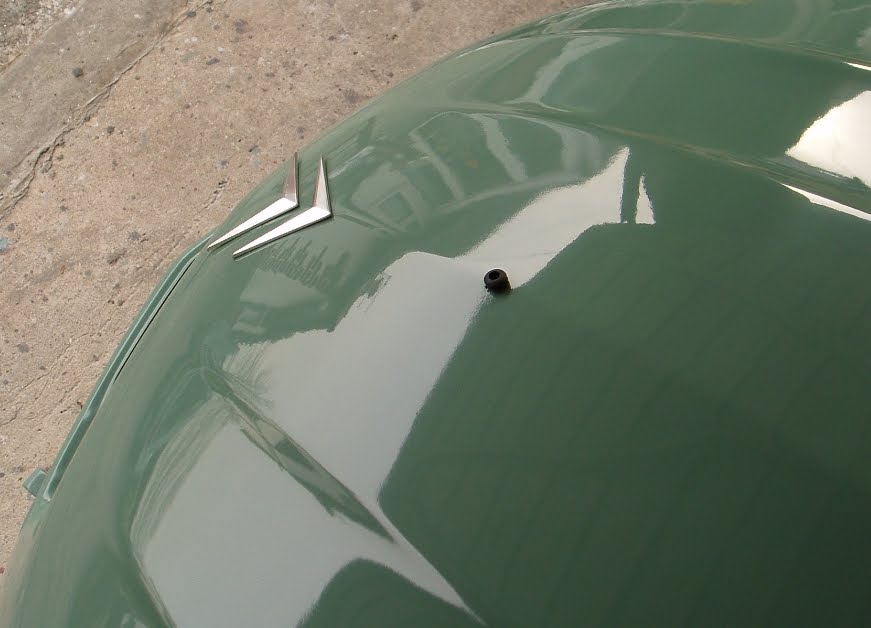 In the photo's above and below the rubber grommets that I will be fitting into the holes that attach the central trim strip can be seen. 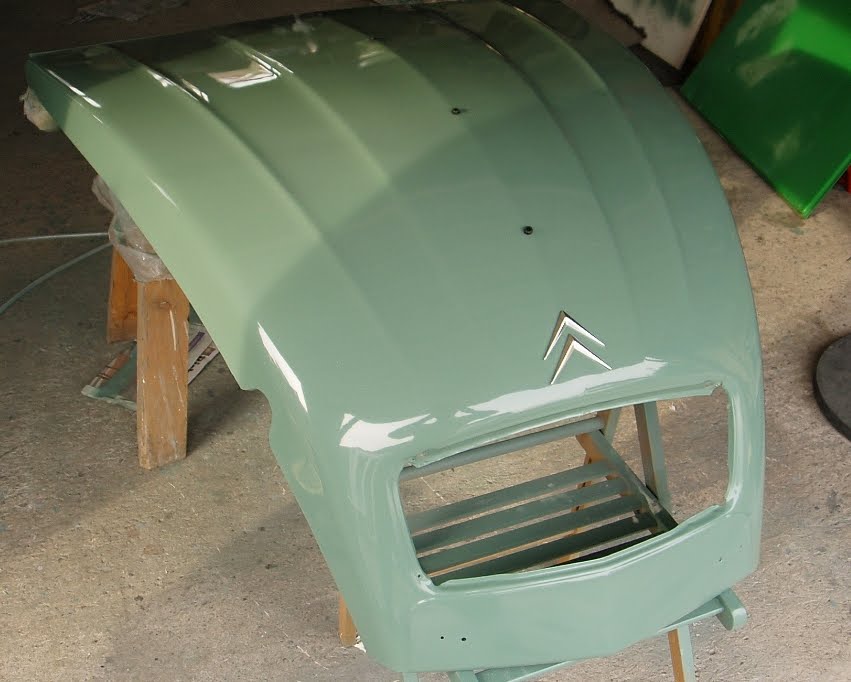 At the other end the hinge sealant that I did in the last post is shown, now fully painted and looking a lot better than it did on my first attempt! The alloy trim is just resting on the bonnet at this point.  And there we are! This photo is only a mock up as I've yet to clean up and paint the mesh that goes behind the grille before fitting it. I pondered whether to buy a new 3 bar grille but I have decided to use my old one simply because although bent and battered, it's a genuine 1960's one that I bought in France about ten years ago. It has been on several of my cars and is my 2cv's equivalent of a comfy old pair of shoes, a little scruffy perhaps, but characterful!  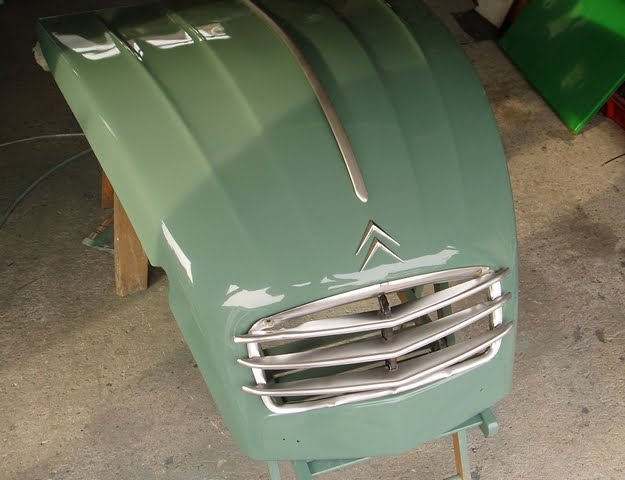
_________________

'Democracy my Arse'
|
| April 10th, 2010, 7:45 pm |

|
|
|
Neil
super slot
Joined: November 28th, 2008, 11:14 pm
Posts: 8797
Location: Cornwall, UK
|
Re: My old Blue Bamboo Absolutely gorgeous!
_________________

|
| April 10th, 2010, 7:48 pm |
|
|
|
Old-Nail
Firing on two.
Joined: October 7th, 2009, 12:10 pm
Posts: 2192
Location: NWUK
|
Re: My old Blue Bamboo 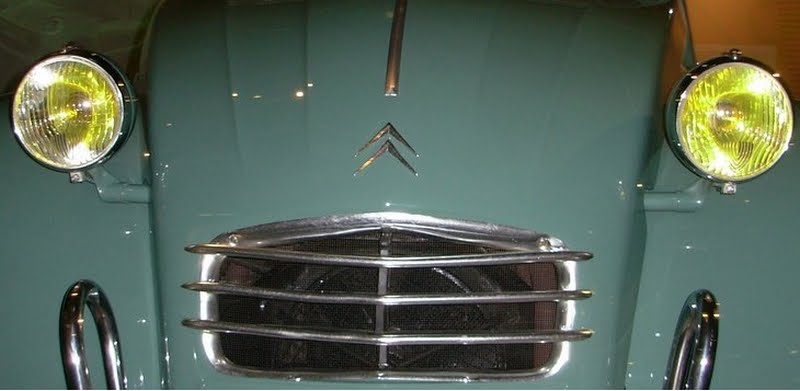 Thanks Neil. The photo above is a genuine '66 AZAM so you can see I'm not so far away with my AZAM-a-like. Another thing I've decided is that with only the front wings still to paint I'm going to do the front lower portions of them in that stonechip stuff before painting them. It paints over very well, and just has to be better than lots of rusty specks where the road debris has hit.
_________________
'Democracy my Arse'
|
| April 10th, 2010, 8:16 pm |
|
|
|
Old-Nail
Firing on two.
Joined: October 7th, 2009, 12:10 pm
Posts: 2192
Location: NWUK
|
Re: My old Blue Bamboo  I couldn't resist!
_________________
'Democracy my Arse'
|
| April 10th, 2010, 9:06 pm |
|
|
|
Jonathan
Firing on two.
Joined: January 1st, 2009, 7:37 pm
Posts: 4708
Location: Disunited Kingdom
|
Re: My old Blue Bamboo WOW! L-O-V-E Old Nail, do you have rectangle front indicators, or the 70s/80s round indicators? 
_________________
1988 built (1989 F-registered) Citroën 2CV-Six
2013 (63-Plate) VW Golf SE 1.4TSI BMT DSG7
1932 Morris Minor Open Two-Seater (The £100 car).


|
| April 10th, 2010, 9:53 pm |
|
|
|
Joe
Firing on two.
Joined: July 23rd, 2009, 4:03 pm
Posts: 1019
Location: Bournemouth
|
Re: My old Blue Bamboo I am so jealous. i just died a little bit inside. butttttttt i am so happy that this build is turning out 10X better than i imagined it would do! it makes me want to stop painting over rust and maybe restore my car. 
_________________

Gas, Grass or Ass. No-one ride for free.
|
| April 10th, 2010, 10:01 pm |
|
|
|
Old-Nail
Firing on two.
Joined: October 7th, 2009, 12:10 pm
Posts: 2192
Location: NWUK
|
Re: My old Blue Bamboo Joe as Nike say - just do it.  Part of the reason I did this blog so publicly is to encourage others to have a go. I have no previous experience, and I don't mind if I screw up in front of thousands of spectators either, The fun is in the doing it, and if you go wrong somewhere there's a lot of knowledgeable folk on here to help out. Jonathan my indicators are round ones not export, I need to paint the surrounds grey to match the other trim but otherwise they're standard.
_________________
'Democracy my Arse'
|
| April 10th, 2010, 10:25 pm |
|
|
|
Old-Nail
Firing on two.
Joined: October 7th, 2009, 12:10 pm
Posts: 2192
Location: NWUK
|
Re: My old Blue Bamboo I spent quite some time today in hanging the front doors accurately before fitting them with the locks, windows and other related stuff. I'd already attached the doors temporarily, but I removed them once more each in in turn to enable me to refit the rubber door seal that goes around the edge and seals out the weather. I then loosened the hinge bolts before putting the door back on and making endless small adjustments to their position to get them to line up so that they close correctly. I then adjusted the striker plate to get a good close fit when the door is in the closed position, the result was that each door now closes with minimal effort, and with a satisfying click.  After the doors had been hung I fitted the hinged lower glazing panels to the front windows, and the interior catches that secure them in the closed position. Finally for today, I cut up some oblong sections of 5 millimetre thick neoprene sheeting which I glued into the pressed recesses of the door panel interior. Neoprene is a closed cell material so won't harbour damp, it is therefore ideal for use as a light weight sound insulation when used on panels that might otherwise vibrate a little.
_________________
'Democracy my Arse'
|
| April 11th, 2010, 9:06 pm |
|
|
|
Old-Nail
Firing on two.
Joined: October 7th, 2009, 12:10 pm
Posts: 2192
Location: NWUK
|
Re: My old Blue Bamboo I think it was the respected 2cv guru Ken Hanna that once said in a post somewhere that you can rarely improve on Citroen's original design for the 2cv, after all that's why the car was such a brilliant design, it contains nothing extraneous, and yet nothing is lacking. 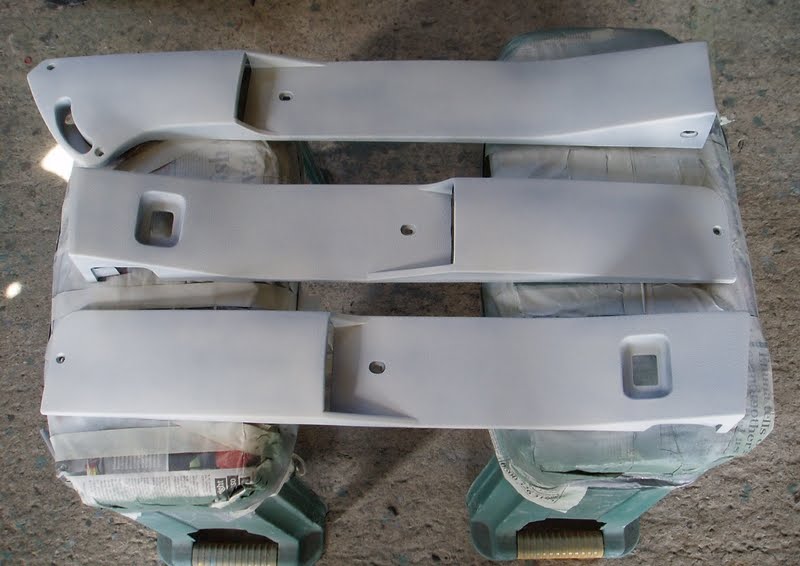 I was thinking about this comment as I was preparing the plastic door cappings above for paint this afternoon. They aren't really necessary, but I'd just like to add a little something extra to the car. Sadly, a previous addition that I had made came back to haunt me today as that one hadn't worked out quite so well. Having fitted the bonnet, I was in the process of attaching these rubber bump stop thingies (below) to the front of it to prevent any chafing against the wings, (notice how they are not the usual black items?) I found a supplier in France that sells grey ones to match the trim so I bought a set, but when they arrived they are more beige than grey, but at least they're different!  Fitting them only took a few minutes, but the rocking motion of the bonnet had made a crack appear in the aforementioned 'addition' that I wish I hadn't made. What I'd done was to try and improve and smooth out the hinge area by adding filler to it, so instead of a lip there would just be a nice smooth curve. This wasn't one of my better ideas, as the filler cracked under the strain of the rocking bonnet! - Bugger! 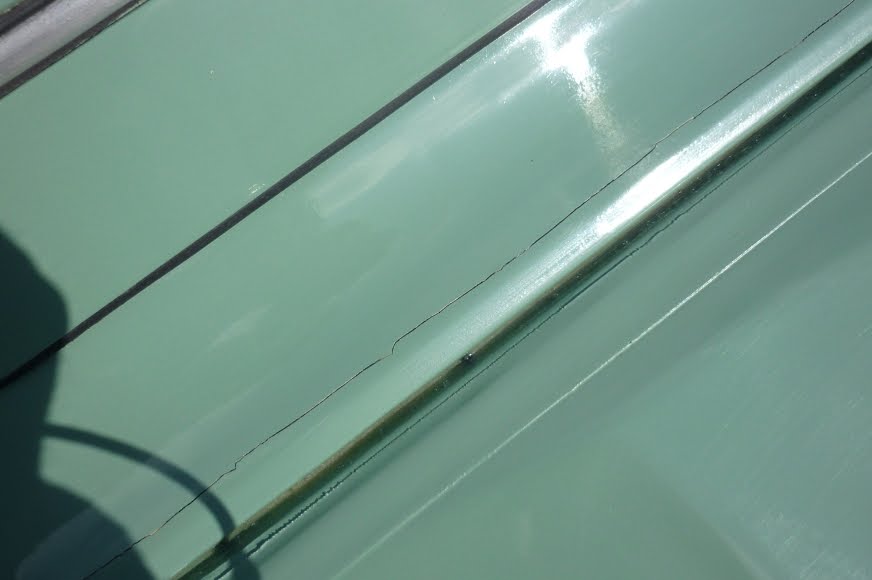 There's nothing wrong with the hinge underneath so it's not as if I needed to do this in order to hide some rust, I did it as an 'improvement', and the crack now shows to remind me of Ken's words! I'll have to fix it by either grinding out all of the filler and starting again, or more likely adding a strip of sealant to it similar to what I did over the the bonnet hinge. These sort of things might go unnoticed by many but I'm the type of guy that notices everything, and the smallest thing then gets to grate on me. One example I'll give here of when I should have left well alone concerns the front door. I spent a couple of hours the other day setting the doors and hinges so that they operated well and closed perfectly - so why didn't I leave it like that? Well, because when I opened the door in the quiet of the garage the rubber seal made a squeaking parping noise, it just wasn't quite right, so I decided to 'fix' it. The upshot was that I struggled for over two hours with this bloody thing, and actually made it worse before I made it better. In the photo below you can see how the rubber became trapped on closing the door at one point, and no amount of adjustments it seemed would shift that. 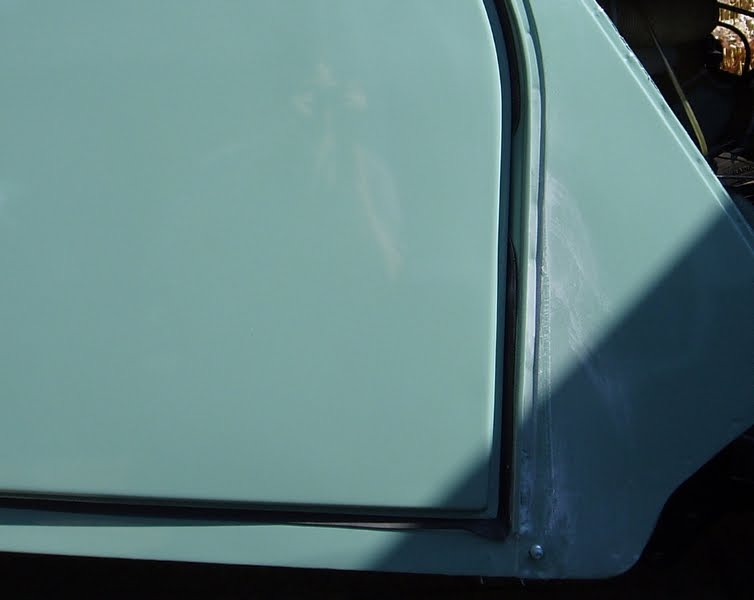 The white dust that you see there is talcum powder that I applied to the rubber to lube it a little, it seemed that no matter how I adjusted things the door wouldn't shut right, until finally I got it to work - Phew! Having wasted all afternoon on this, and given the door and hinges a multitude of adjustments all is now well again. what a pig of a job! What I don't understand is how the passenger side door shuts absolutely perfectly, with none of the folding rubber problems, so you might think it would be a simple matter of looking at the passenger side then reproducing those results on the other side, but that wasn't an option as although the passenger door operates perfectly, the door shut lines aren't perfect from the outside. This can be seen in the phot above visible from where the front and rear doors meet at the top, and from the swage line below the glass. 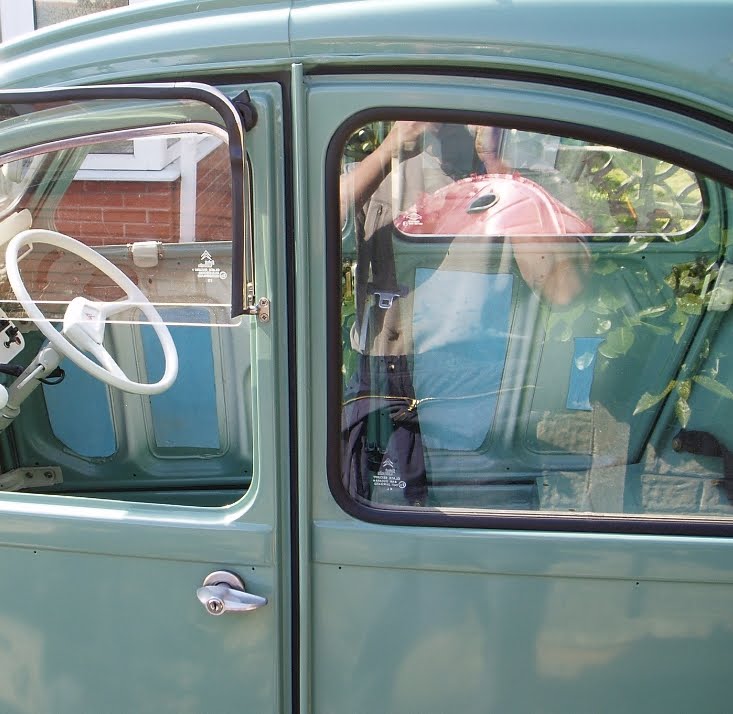 So for someoneone like myself that 'notices' things, today has been a bit of a bummer, perhaps I should learn to leave well alone!
_________________
'Democracy my Arse'
|
| April 14th, 2010, 7:24 pm |
|
|
Who is online |
Users browsing this forum: No registered users and 21 guests |
|
You cannot post new topics in this forum
You cannot reply to topics in this forum
You cannot edit your posts in this forum
You cannot delete your posts in this forum
You cannot post attachments in this forum
|
|